
Create and send invoices
Bill a customer, send the invoice, record payments and let the system remind late payers.
An invoice bills a customer for your work or goods. You build it from your products and send it, then record each payment as the money comes in. The system works out VAT and totals and can email the customer before and after the due date.
You need the Invoices permission to see these pages.
Key ideas#
| Status | What it means | How the invoice gets it |
|---|---|---|
| Draft | Work in progress. The system won't send it, and you can delete it. | Every new invoice starts here. |
| Unpaid | Issued and waiting for payment. | You set it. |
| Partially Paid | Part of the money has come in. | The system sets it when you record a payment smaller than the amount due. |
| Paid | Settled in full. | The system sets it when your payments cover the total. You can also set it yourself. |
| Cancelled | The invoice no longer stands. | You set it. |
| Refunded | You gave the money back. | You set it. |
An Unpaid or Partially Paid invoice past its due date counts as overdue. It stands out in the list, and its page shows "Invoice is overdue by N days".
A new invoice shows a temporary number such as PROFORMA-112. It keeps it until it reaches your firm's numbering status, which is Paid unless your firm chose Unpaid or Partially Paid. At that point the system gives it the next official number, for example INV-00045, and you can't edit the invoice any more. Your administrator picks the numbering status under Invoice numbering. Proforma invoices explains how these temporary numbers differ from proforma documents.
Create an invoice#
- Go to CRM > Invoices and click Create Invoice. The system creates a draft and opens it.
- If your firm has business profiles, pick the company that issues the invoice in Issued By.
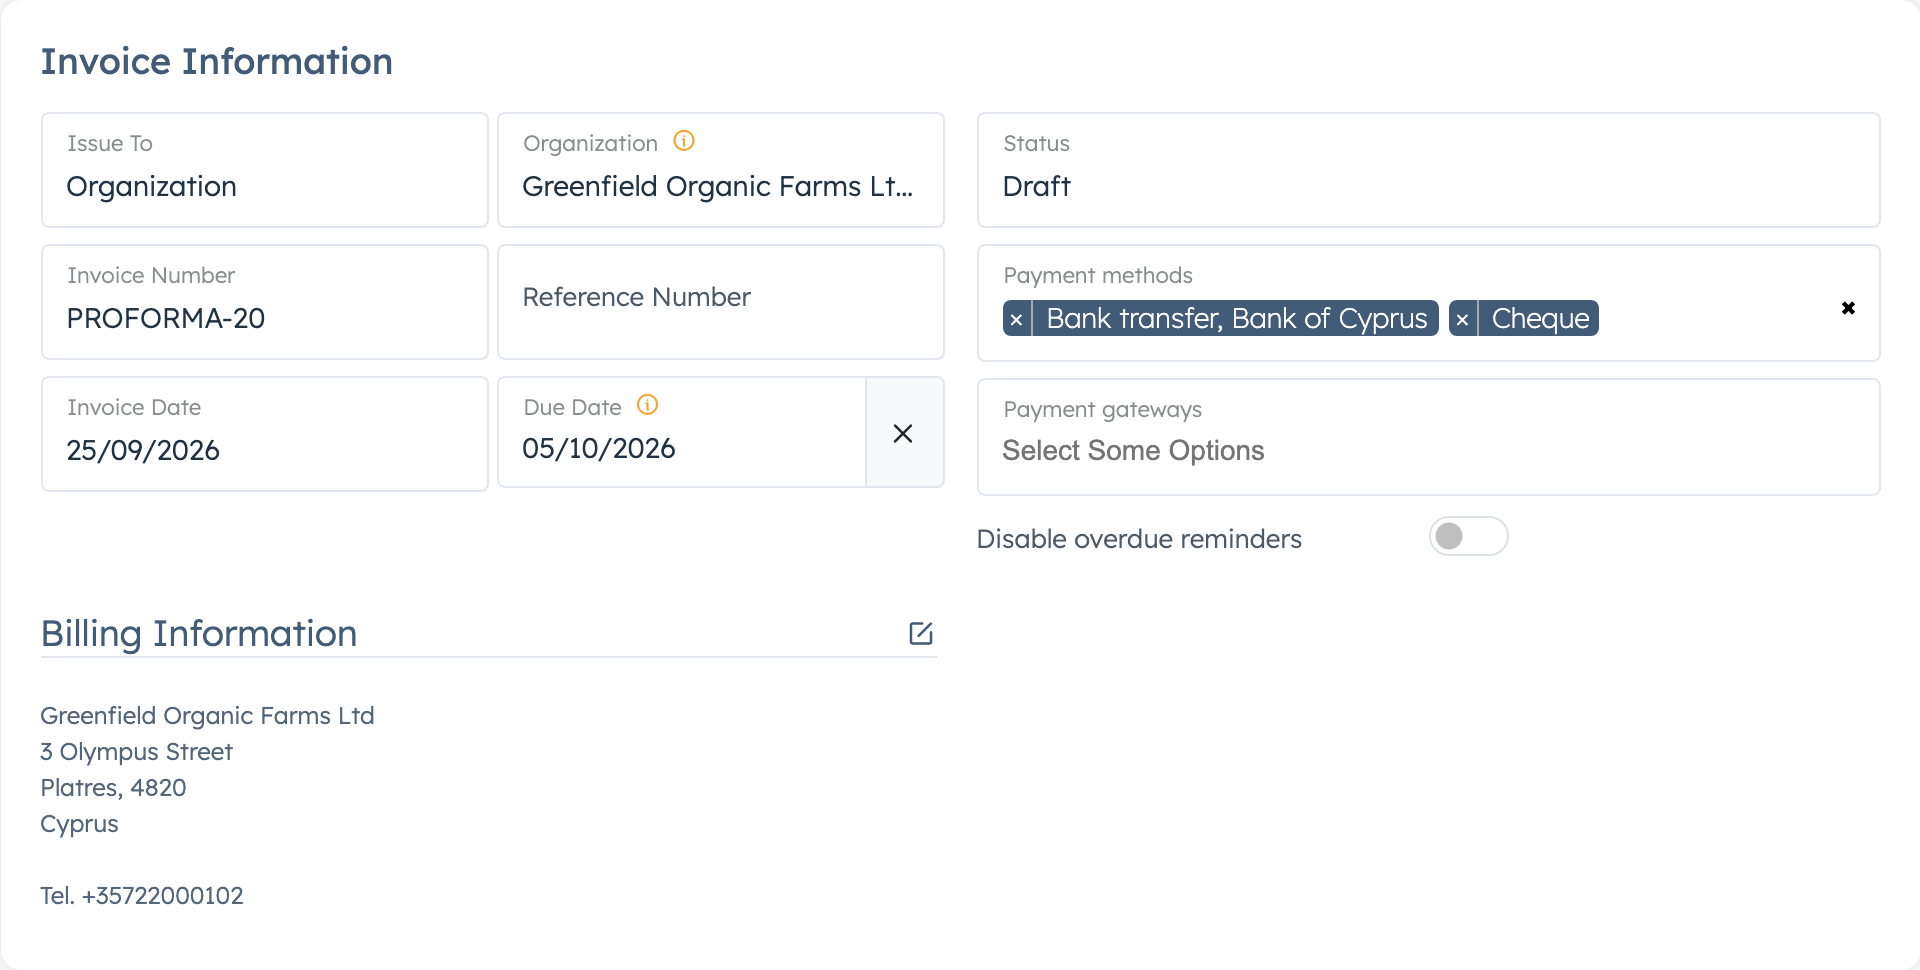
- Set Issue To and choose the customer (see the table below). The billing details fill in.
- Check Invoice Date and Due Date.
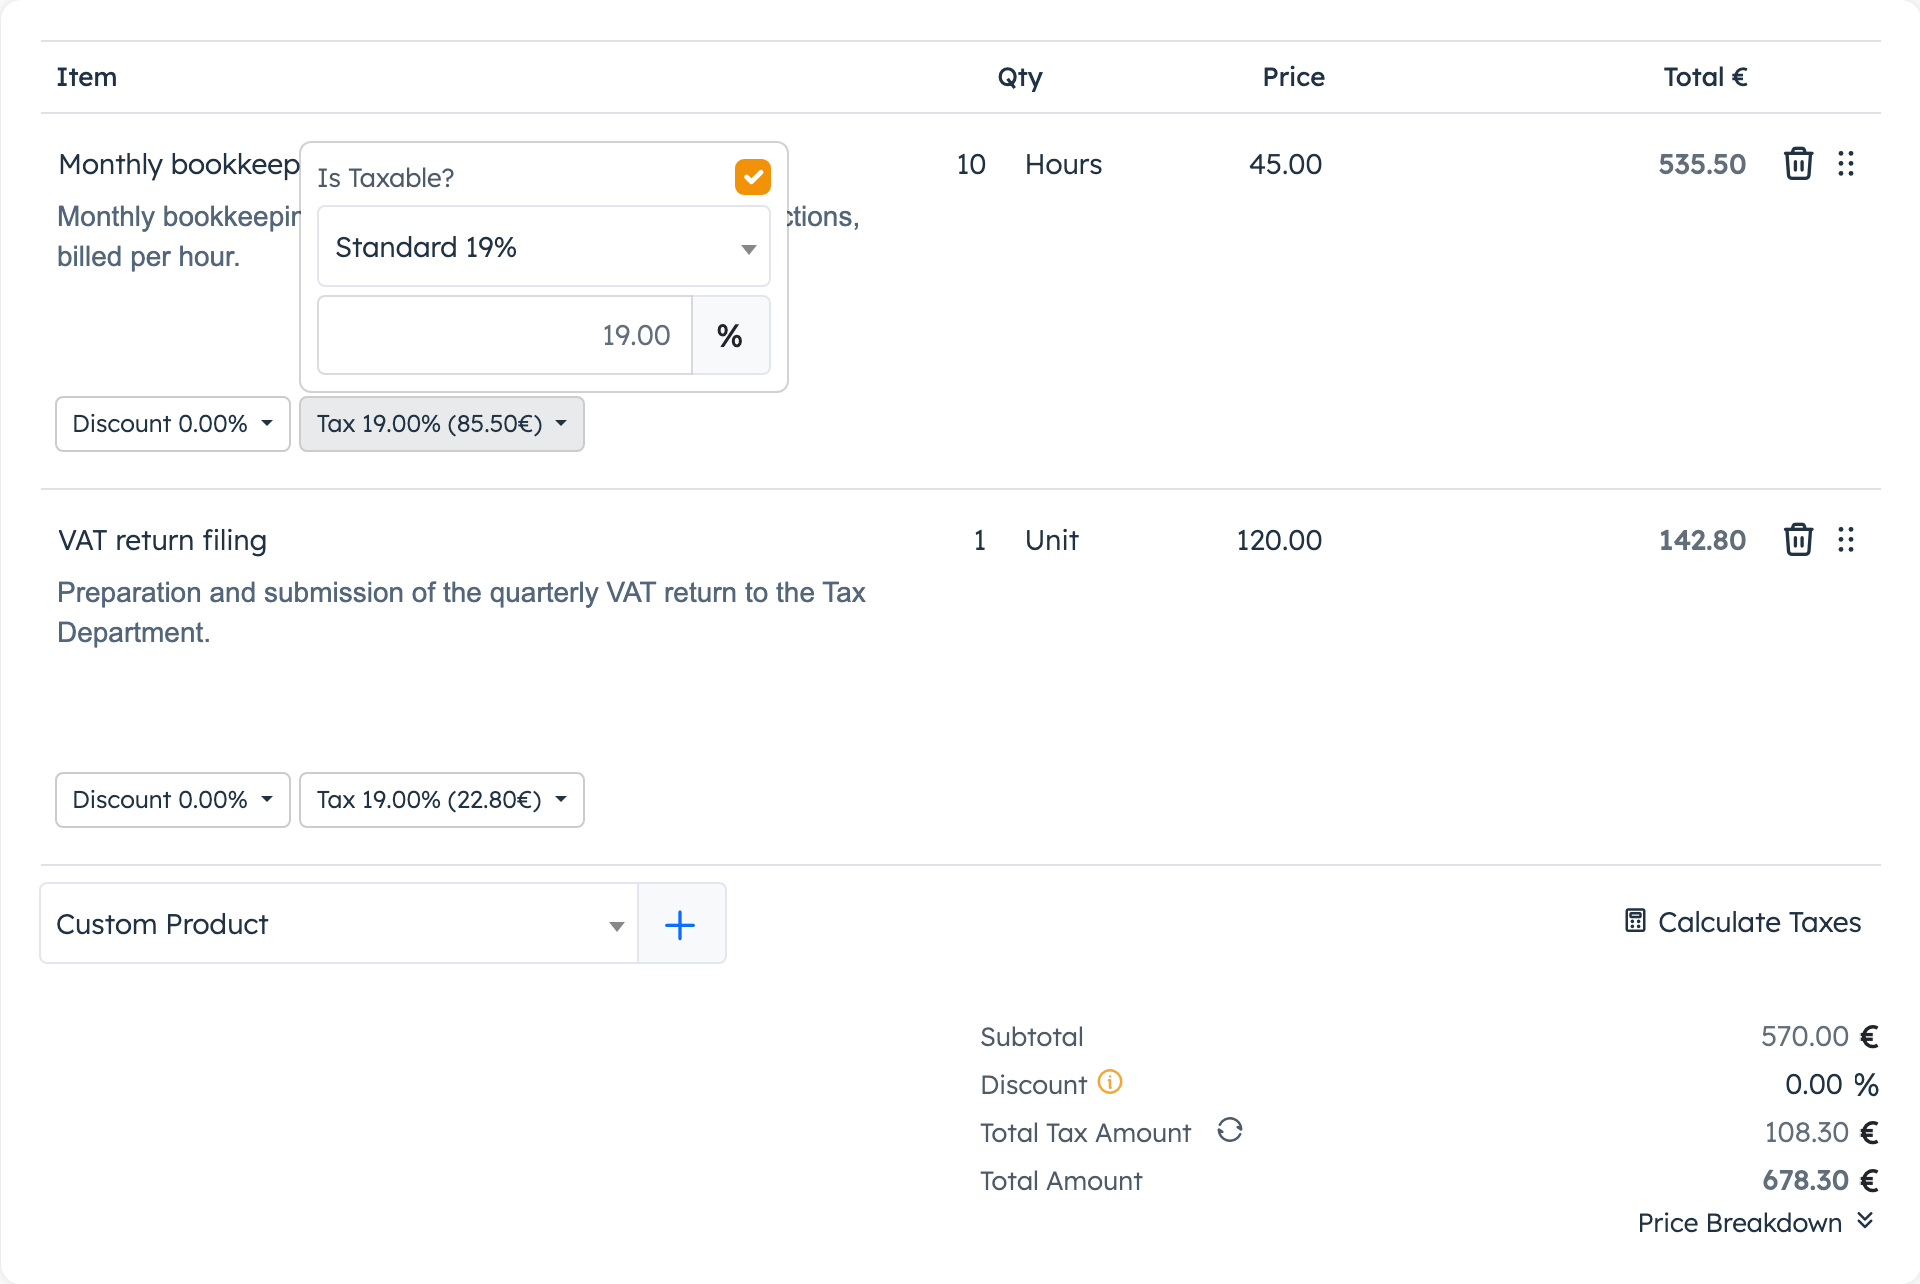
- Add lines: search for a product in Custom Product and click +, or type into the empty line. Lines save as you type.
- Click Calculate Taxes to fill in the VAT rates.
- Check Payment methods and Payment gateways.
- Click Update.
| Issue To | Use it for |
|---|---|
| Organization | A company in the system. The billing address, customer type and VAT number come from it. |
| User | A customer's portal login. The billing details come from the user. |
| Custom | A one-off customer. You type the name and address yourself. The system can't email these invoices, so send the PDF yourself. |
To change the billing details, click the pencil next to Billing Information, then that block's Update. The system keeps a VAT Number only when Customer Type is Business.
Lines, VAT and totals#
Under each line, Discount takes an amount or a percentage off that line, and Tax holds the tax group and VAT rate.
Calculate Taxes fills each line's rate from its tax group, the issuing company's tax setup, and the customer's country and type. Saving never changes a rate on its own, so click it again after you change the customer. Taxes and VAT covers the setup.
Price Breakdown opens the totals. The Discount there covers the whole invoice and works only when no line has its own discount and all lines have the same VAT rate. Adjustment takes a fixed amount off the total, for rounding, and stops the customer paying online.
The rest of the form#
| Field | What it does |
|---|---|
| Due Date | Starts as the invoice date plus the period in CRM settings (10 days by default) and moves when you change Invoice Date. Clear it with the x. Without a due date the customer gets no reminders. |
| Reference Number | The customer's purchase order number, or your own reference. It prints on the PDF. |
| Payment methods | The payment instructions to print on the invoice, such as your IBAN. See Payment methods and wallets. |
| Payment gateways | The online payment services the customer may use to pay this invoice. |
| Terms & Conditions, Notes | Start with your firm's standard text. Switch off Visible Invoice Terms & Conditions or Visible Invoice Notes to keep them off the PDF and the customer's page. Display on a new PDF page gives them a page of their own. |
| Admin Note | For your staff only. It never prints. |
Send the invoice#
The system only sends invoices that are out of Draft.
- Under Invoice Information, set Status to Unpaid and click Update.
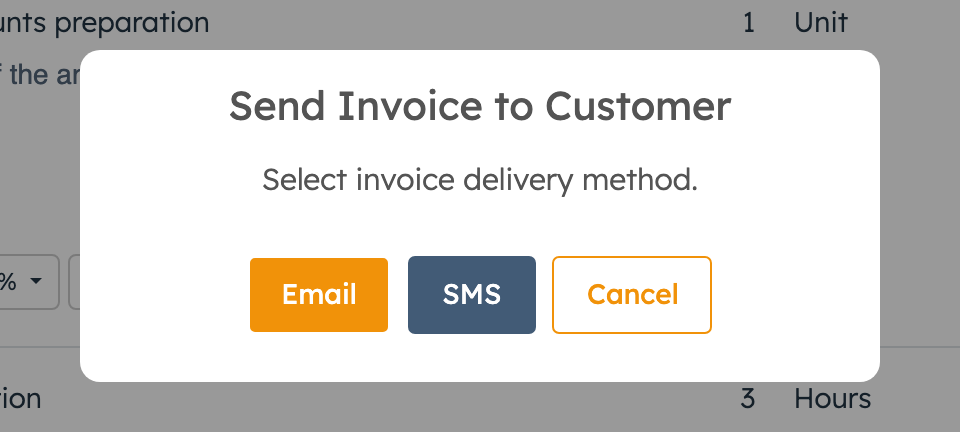
- Click Send to Customer at the top of the page.
- Choose Email or SMS.
The email goes to the organisation's primary contact, or to the user you issued the invoice to. Its standard text has a View Invoice link that opens the invoice in the customer's account, so the customer needs a portal login to use it. The PDF goes with it only if Attach PDF to invoice eMails is on in CRM settings. The SMS goes to the Mobile number in the billing details and needs your firm's SMS service. The page reloads without a confirmation message.
To send it another way, use the buttons at the bottom: Export PDF, Print, or Copy Viewkey for a link that opens the invoice without logging in.
Customers with a portal login also see their invoices in their account. If you picked a payment gateway, they see Pay Now there until they pay something, as long as the invoice has no adjustment. On the Copy Viewkey link, a customer who isn't logged in sees Login to Pay. After an online payment, check the invoice's status and payments before you record anything.
Record a payment#
- Open the invoice. It must be out of Draft.
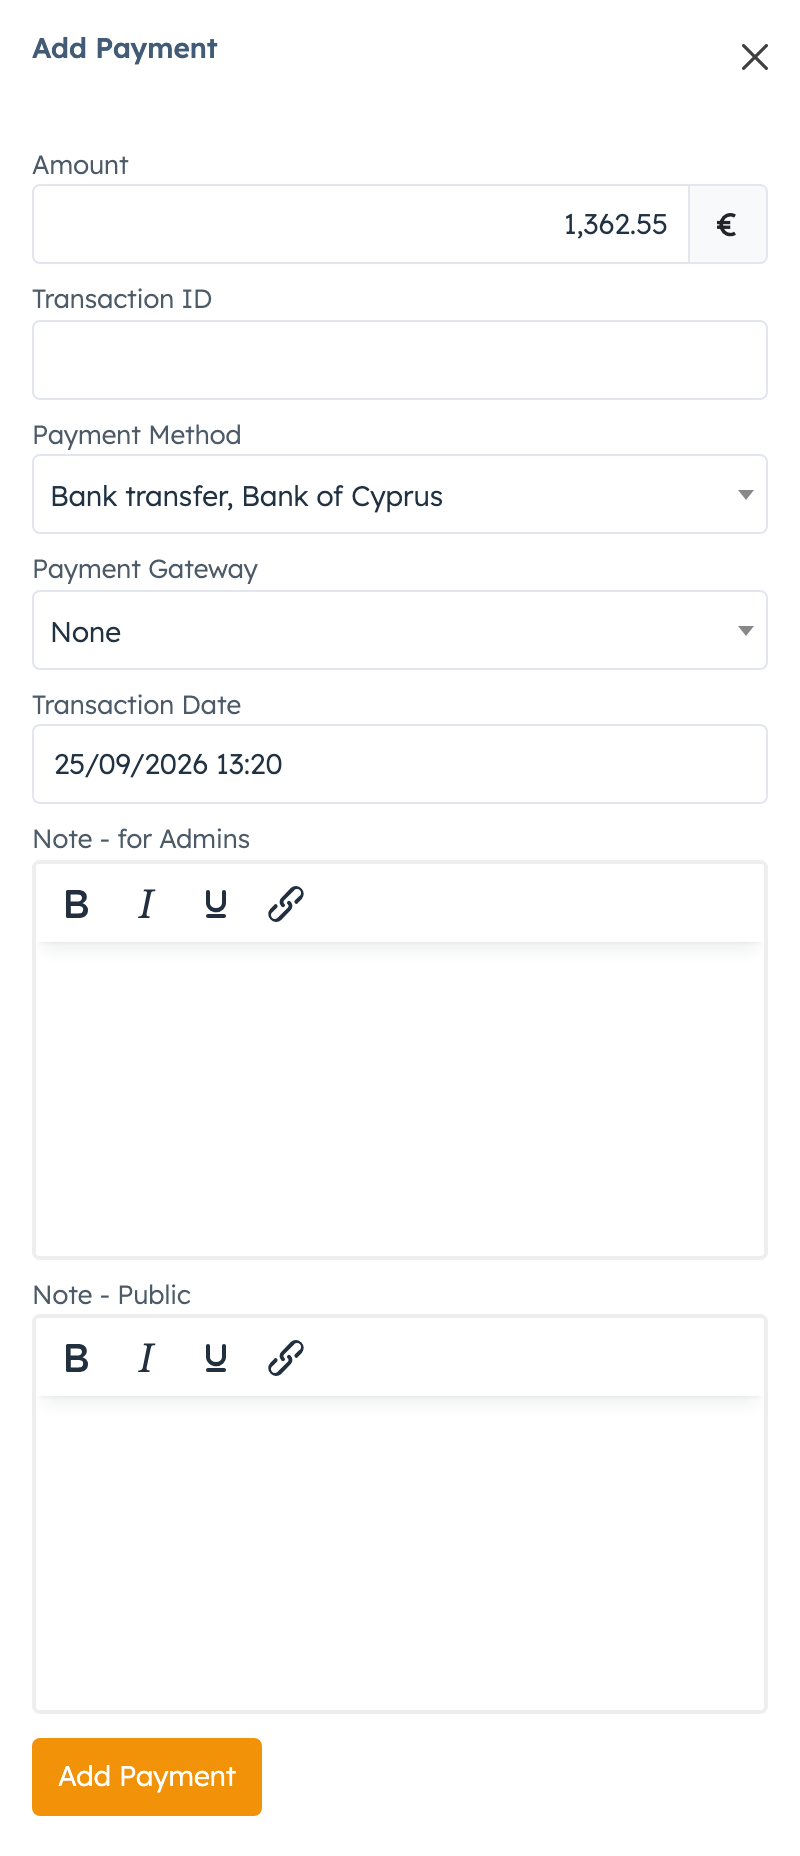
- Under Invoice Payments, click Add Payment. The buttons at the top of the page have it too, until the invoice is Paid.
- Check the Amount. It starts with the amount still due. For a part payment, or on an invoice you already set to Paid, type what you received.
- Pick a Payment Method or a Payment Gateway (one of the two).
- Check the Transaction Date. Put the bank reference in Transaction ID if you have one.
- Click Add Payment at the bottom of the panel.
The status moves to Partially Paid or Paid. Add each part payment as the money arrives. If the payment brings the invoice to your numbering status and it has no official number yet, the page reloads with "Payment added and Invoice published". The invoice now has its official number. Its invoice date changes to today, and the due date is counted again from today.
This number comes from your main company's sequence, even on an invoice from a business profile. To keep the profile's own numbers, give the invoice its number first: set Status to your numbering status, click Update, then add the payment. See Invoice numbering.
On an invoice that already has its official number, a red "Error publishing Invoice" message can follow "Payment added". The system has saved the payment, and the invoice keeps its number.
Don't add a payment to a Cancelled or Refunded invoice. The system switches it to Paid, and gives it an official number if it has none yet.
Payments appear in the invoice's Invoice Payments section. The row icons download, print or email a receipt, or delete the payment. Delete one and the status moves back. The invoice keeps its official number.
CRM > Invoice Payments lists the payments your staff recorded on all invoices. Online payments show only on the invoice itself. Changing an amount on that page leaves the invoice status as it was, so to fix a wrong amount, delete the payment and add it again.
Change or cancel an invoice#
Until the invoice has its official number, you can change anything. Click the pencil next to Invoice Information, make your changes and click Update. To delete a draft, use Delete in its row menu in the Invoices list.
Once it has its official number, the invoice is locked. You can still send it and add payments. To correct or cancel it, issue a credit note. To show the invoice as cancelled as well:
- In CRM > Invoices, tick the invoice.
- Click Update Status in the bar that appears, then Yes.
- Choose Cancelled under Status and click Update.
Update Status writes the new status and does nothing else. It gives no number and sends no email, and a linked proforma or order keeps its old status. Use it only on invoices that already have their official number. For the others, set the status on the invoice page.
Due date reminders#
The system can email the customer up to three times before the due date and three times after it, then every few days if your firm wants. Each reminder is the invoice email, worded as due soon or overdue, with the PDF if your firm attaches it. Reminders go only for Unpaid and Partially Paid invoices with a due date, issued to an organisation or a user.
To stop the overdue reminders for one invoice, switch on Disable overdue reminders under Invoice Information before the invoice gets its official number. After that the switch is out of reach. The reminders before the due date still go.
Your administrator switches reminders on and sets the days on the Reminders tab. See CRM settings.
Orders#
An order is the system's record of a sale through your online shop or checkout. Firms that only send invoices can skip this section.
- Create Order at the bottom of an invoice makes an order from it, once the invoice is out of Draft and isn't Cancelled or Refunded. The customer must be an organisation or a user. The button then reads View Order.
- Pay Now creates an order behind the invoice.
- If your firm sells through an IXXO shop or Shopify, you can bring those orders into the CRM as invoices, with the amounts the customer paid.
- With Automatically Create Invoice for Paid Orders on in CRM settings, an order that becomes paid gets a paid invoice. The system issues it from your main company and numbers it from the main sequence. If the order already has an invoice, that invoice changes to Paid.
Subscriptions#
This option shows only when Subscription Options in Invoices/Proposals is on in CRM settings. Each line then has a Subscription choice: Daily, Weekly, Bi-Weekly, Monthly, Quarterly, Yearly or Custom.
- Picking a period stores it on the line and prints it on the invoice. The Type column in the Invoices list shows Subscription.
- Renewals start after you click Create Order, after a payment you record gives the invoice its official number, or when someone moves the invoice's order to Process or Completed under Orders. Saving the invoice with a new status doesn't start them, even when that gives it its number.
- At the end of each period, the system creates a new order and a proforma invoice for the same lines at the same prices. Your main company issues the proforma, even if the first invoice came from a business profile.
- Nothing charges the customer or emails them. Send each renewal proforma yourself, see Proforma invoices.
- To stop renewals, open the subscription under Orders > Subscriptions and cancel or suspend it. You need the Manage Orders and Manage Subscriptions permissions. Deleting the invoice doesn't stop renewals.
Switching the setting off hides the choice, but lines that already have a period keep it.
Good to know#
- Each click on Create Invoice saves a new draft. Delete the drafts you don't use.
- Setting Paid by hand records no payment. Use Add Payment so your payment list and receipts match.
- Duplicate in the row menu copies an invoice to a new draft with the same dates. Change the dates on the copy.
- The Copy Viewkey link opens the invoice for anyone who has it, drafts included. Share it once the invoice is final.
- Adding a stock-tracked product takes it off stock, and deleting a draft doesn't put it back. See Warehouses.