
Track new leads
Keep possible customers in one list, then turn the good ones into contacts or organisations.
A lead is someone who might become a customer: a person or company that called you or filled in a form on your website. You keep leads in their own list, apart from your contacts. Once a lead is worth working with, you turn it into a contact, an organisation, or both.
You need the Leads permission to open this area.
Key ideas#
| Term | What it means |
|---|---|
| Lead | A possible customer you haven't started working with yet. It needs at least a first name, last name or company. |
| Contact | A person or company your firm works with. You create deals and activities for contacts. See Contacts. |
| Organisation | A customer you can invoice. |
| Source | Where the lead came from, for example your website or a referral. |
| Group | A team bucket for leads. It decides which colleagues see the lead in their list. |
A lead can't become a deal directly. You turn it into a contact first and create the deal from the contact.
Add a lead#
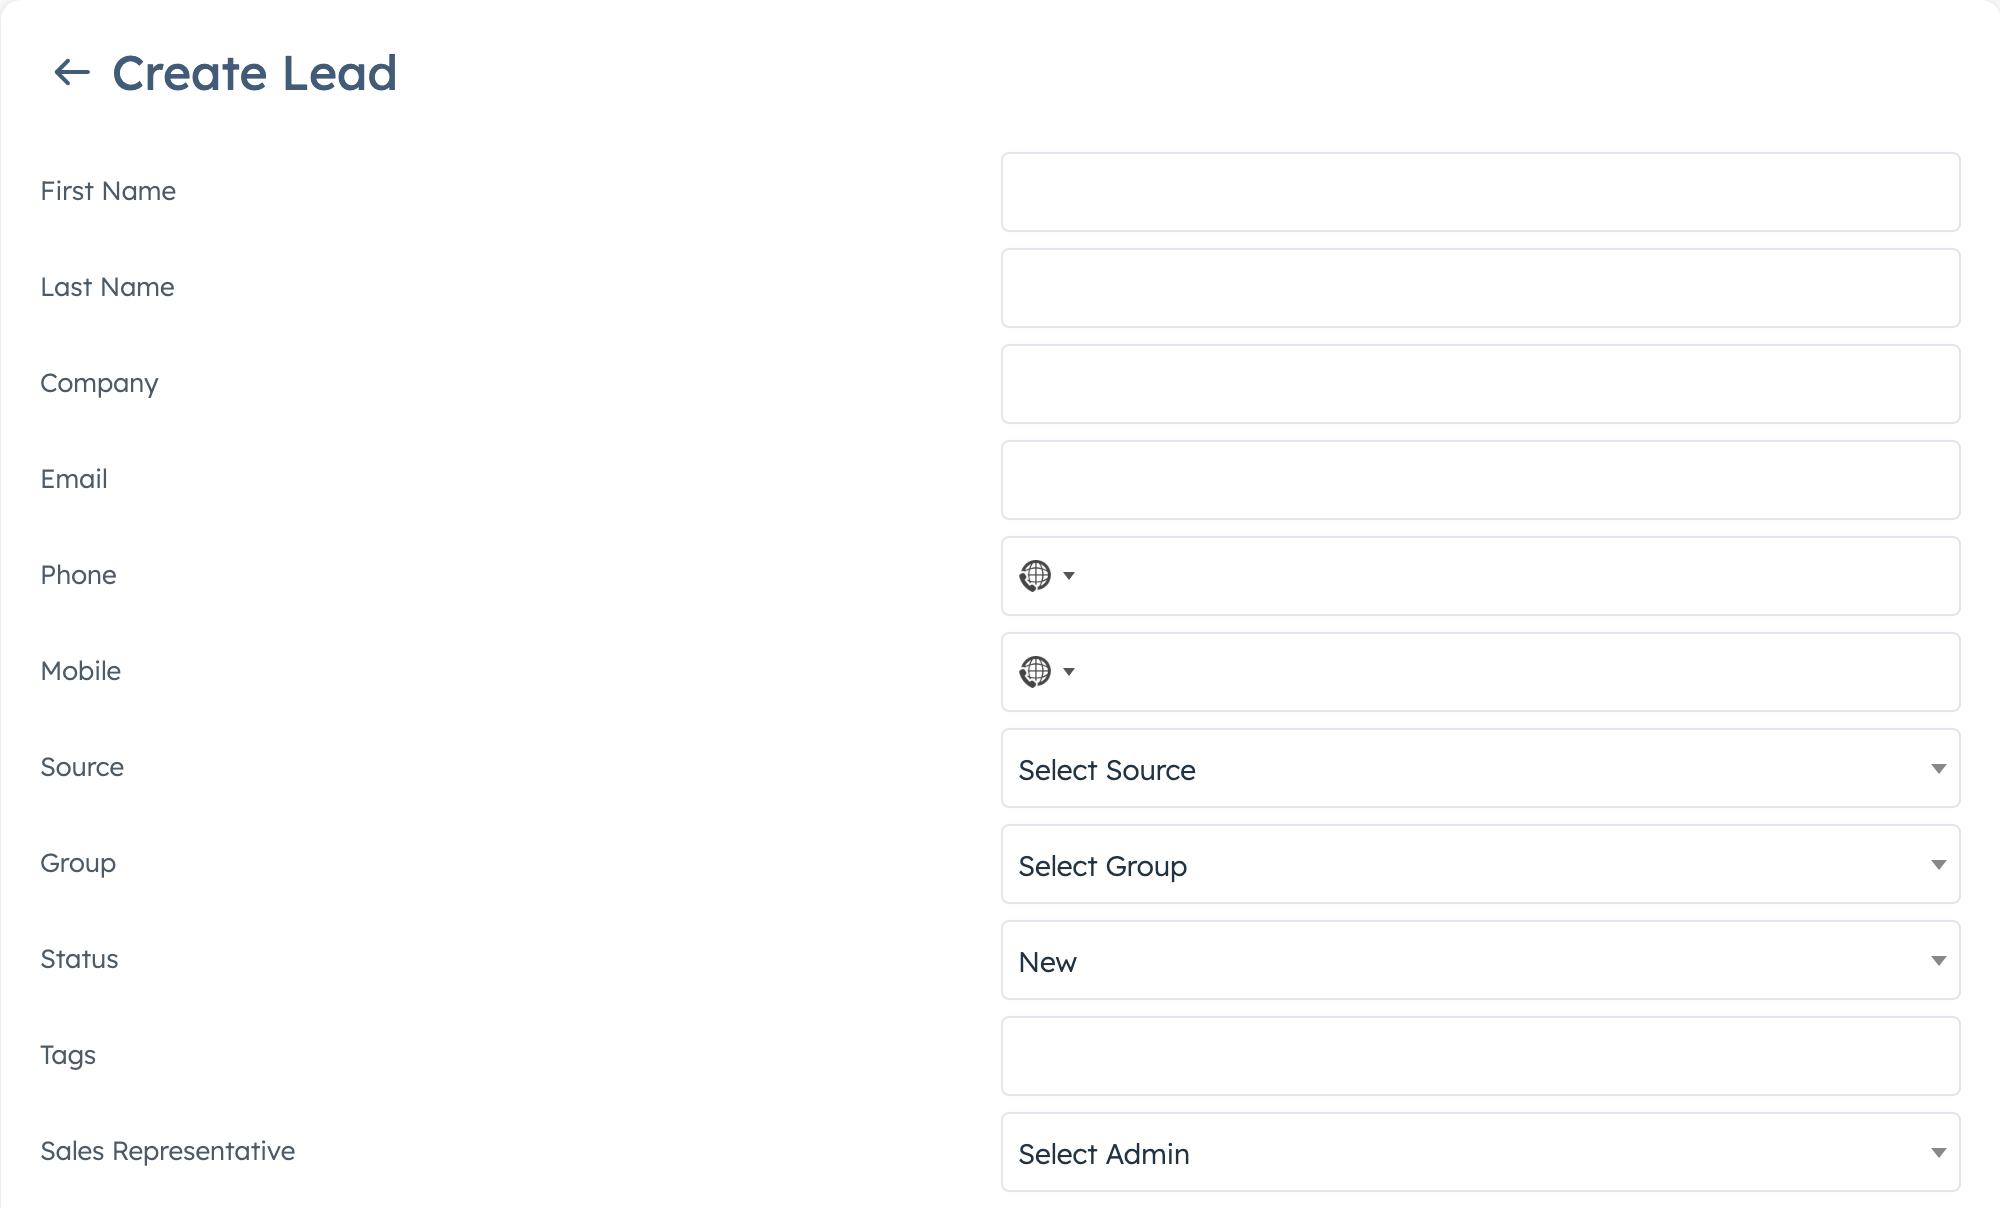
- Go to CRM > Leads and click Create Lead.
- Fill in First Name, Last Name or Company. One of the three is enough.
- Add Email, Phone and Mobile if you have them.
- Pick a Source and, if your firm uses them, a Group.
- Choose a Status. It's a label for your own tracking (New, Contacted, Qualified, Unqualified, Other) and changing it doesn't trigger anything. It shows on the lead page, not in the list.
- Pick the Sales Representative, the colleague looking after this lead.
- Add Tags or Notes / Comments if useful. Typing a tag that doesn't exist creates it.
- Click Save. The lead page opens and shows "Lead created".
In the leads list, colleagues who aren't super admins see only leads they created, leads where they're the Sales Representative, and leads in a group that lists them. Set a Sales Representative or Group if someone else needs to follow up.
The lead form only offers active sources and the groups you have access to. If a lead's source is switched off, or it sits in a group you can't access, that box looks empty, and clicking Save removes the source or group from the lead. Switch the source back on first, or ask a colleague in that group to make the change.
Find a lead#
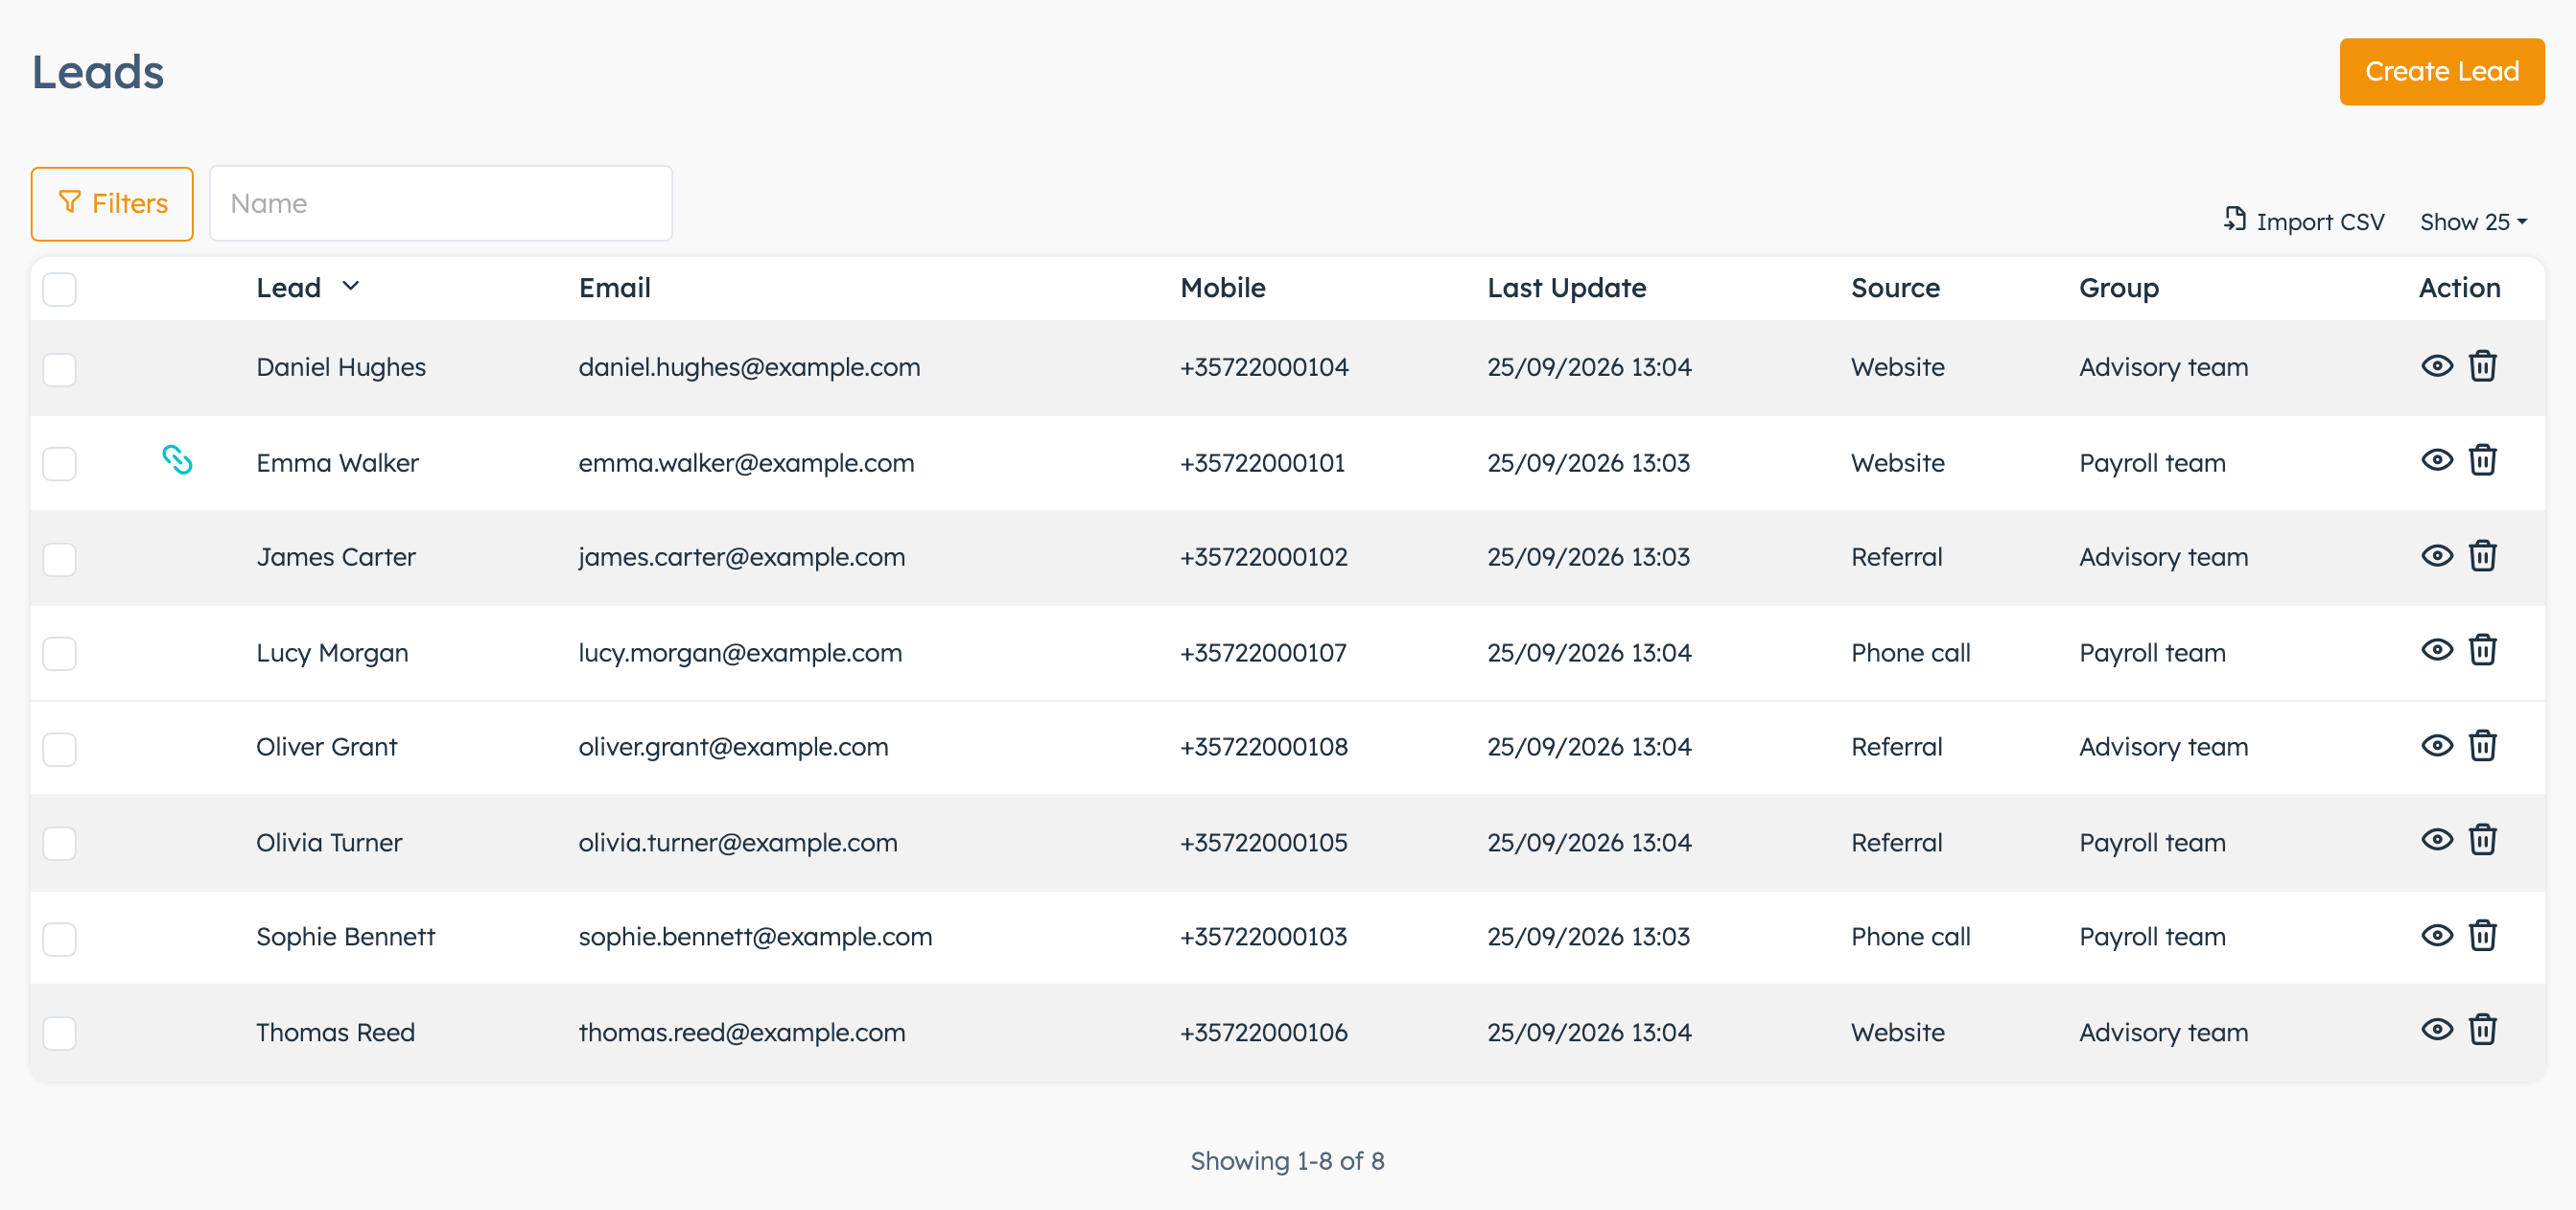
- Go to CRM > Leads and type in Name. It searches first name, last name and company.
- To narrow the list, click Filters and pick eMail, Phone, Mobile, Source, Group, Tags or one of your own lead fields. Click a filter a second time to remove it.
- Click the Lead or Email column heading to sort.
- Click the eye icon for a quick look, or click the row to open the full lead.
The list updates as you type. Clear Filters removes every filter at once. A link icon next to a lead means it already has a contact.
Change many leads at once#
- Tick the leads you want. The box in the heading ticks every lead on the page.
- In the bar at the bottom, click Status, Source or Group.
- Click Yes to confirm, pick the new value and click Update.
Turn a lead into a contact#
Do this when you're ready to work with the person, for example to log calls or open a deal. You need the Contacts permission to see Create Contact.
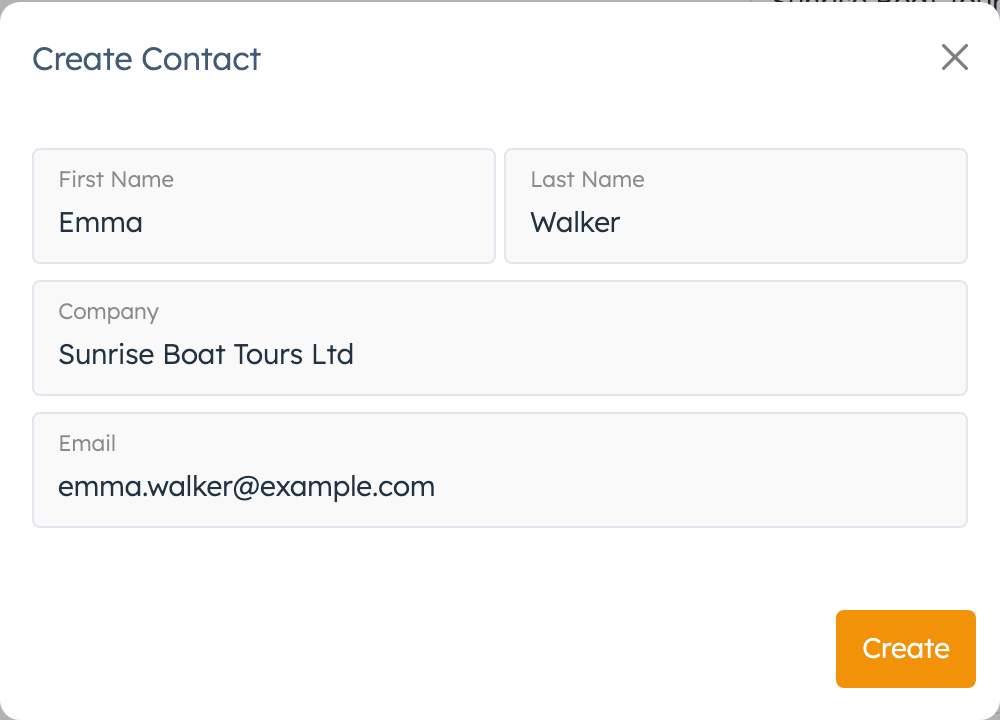
- Open the lead and click Create Contact.
- Check First Name, Last Name, Company and Email.
- Click Create. You see "Contact created" and the Create Contact button disappears.
- Go to CRM > Contacts and open the new contact. You're its manager.
- Change its Status from Draft to the right stage, for example Contacted. Draft contacts don't appear when you pick a contact for a deal or an activity.
The contact gets the name, company and email from the popup, plus the lead's phone, mobile, tags and any of your own fields that apply to both leads and contacts. It doesn't get the lead's source, group, status, sales representative or notes. Copy notes across by hand if you need them.
The lead stays in your leads list, unchanged, with a link icon to show it has a contact.
To convert several leads, tick them in the list and click Contacts in the bottom bar. The system skips leads that already have a contact. These contacts start as Draft too. Reload the page afterwards to see the link icons.
Turn a lead into an organisation#
Do this when the lead becomes a paying customer and you need to invoice them.
- Open the lead. Make sure First Name, Last Name and Email are filled in, then click Save.
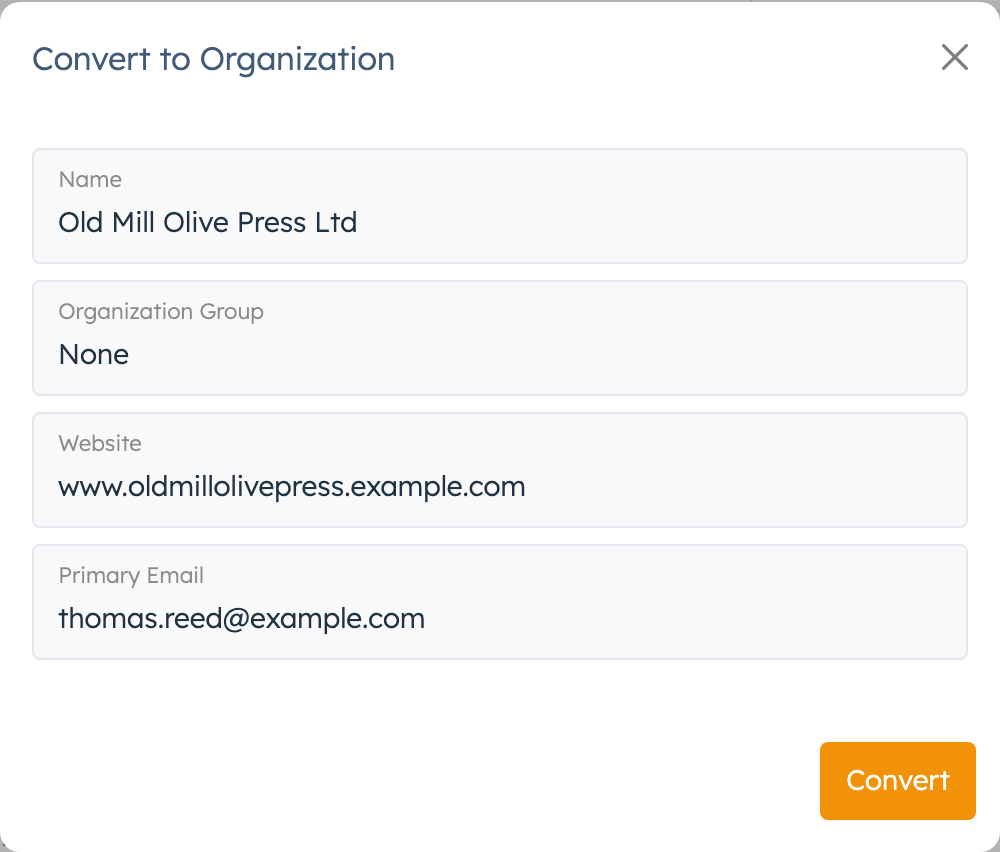
- Click Create Organization.
- Check Name (prefilled with the lead's company) and Primary Email. Both are required.
- Pick an Organization Group if your firm uses them and add the Website.
- Click Convert. The system takes you back to the leads list.
The new organisation is under Organizations. It gets the name, website and group from the popup. The customer account with the Primary Email becomes the organisation's main user. If no account uses that email yet, the system creates one and doesn't email that person. Any proposals you sent to the lead move to the new organisation.
The lead's phone, notes, tags, source and your own lead fields don't carry over. The lead stays in the list, and clicking Create Organization again creates a second organisation.
Add your own lead fields#
Your firm can add extra fields to leads, such as company size or industry. An administrator sets these up in the system's Custom Fields settings, with Available for including Leads.
- Save the lead first. The field tabs appear only after that.
- Open the Custom Fields tab. Fields in a group set to Display Separately get a tab of their own.
- Fill in the fields and click Update Fields. The Save button on the General tab doesn't save these fields.
If the lead has a contact, the system copies these values to the contact's matching fields and replaces what was there. Changes you make on the contact copy back to the lead the same way.
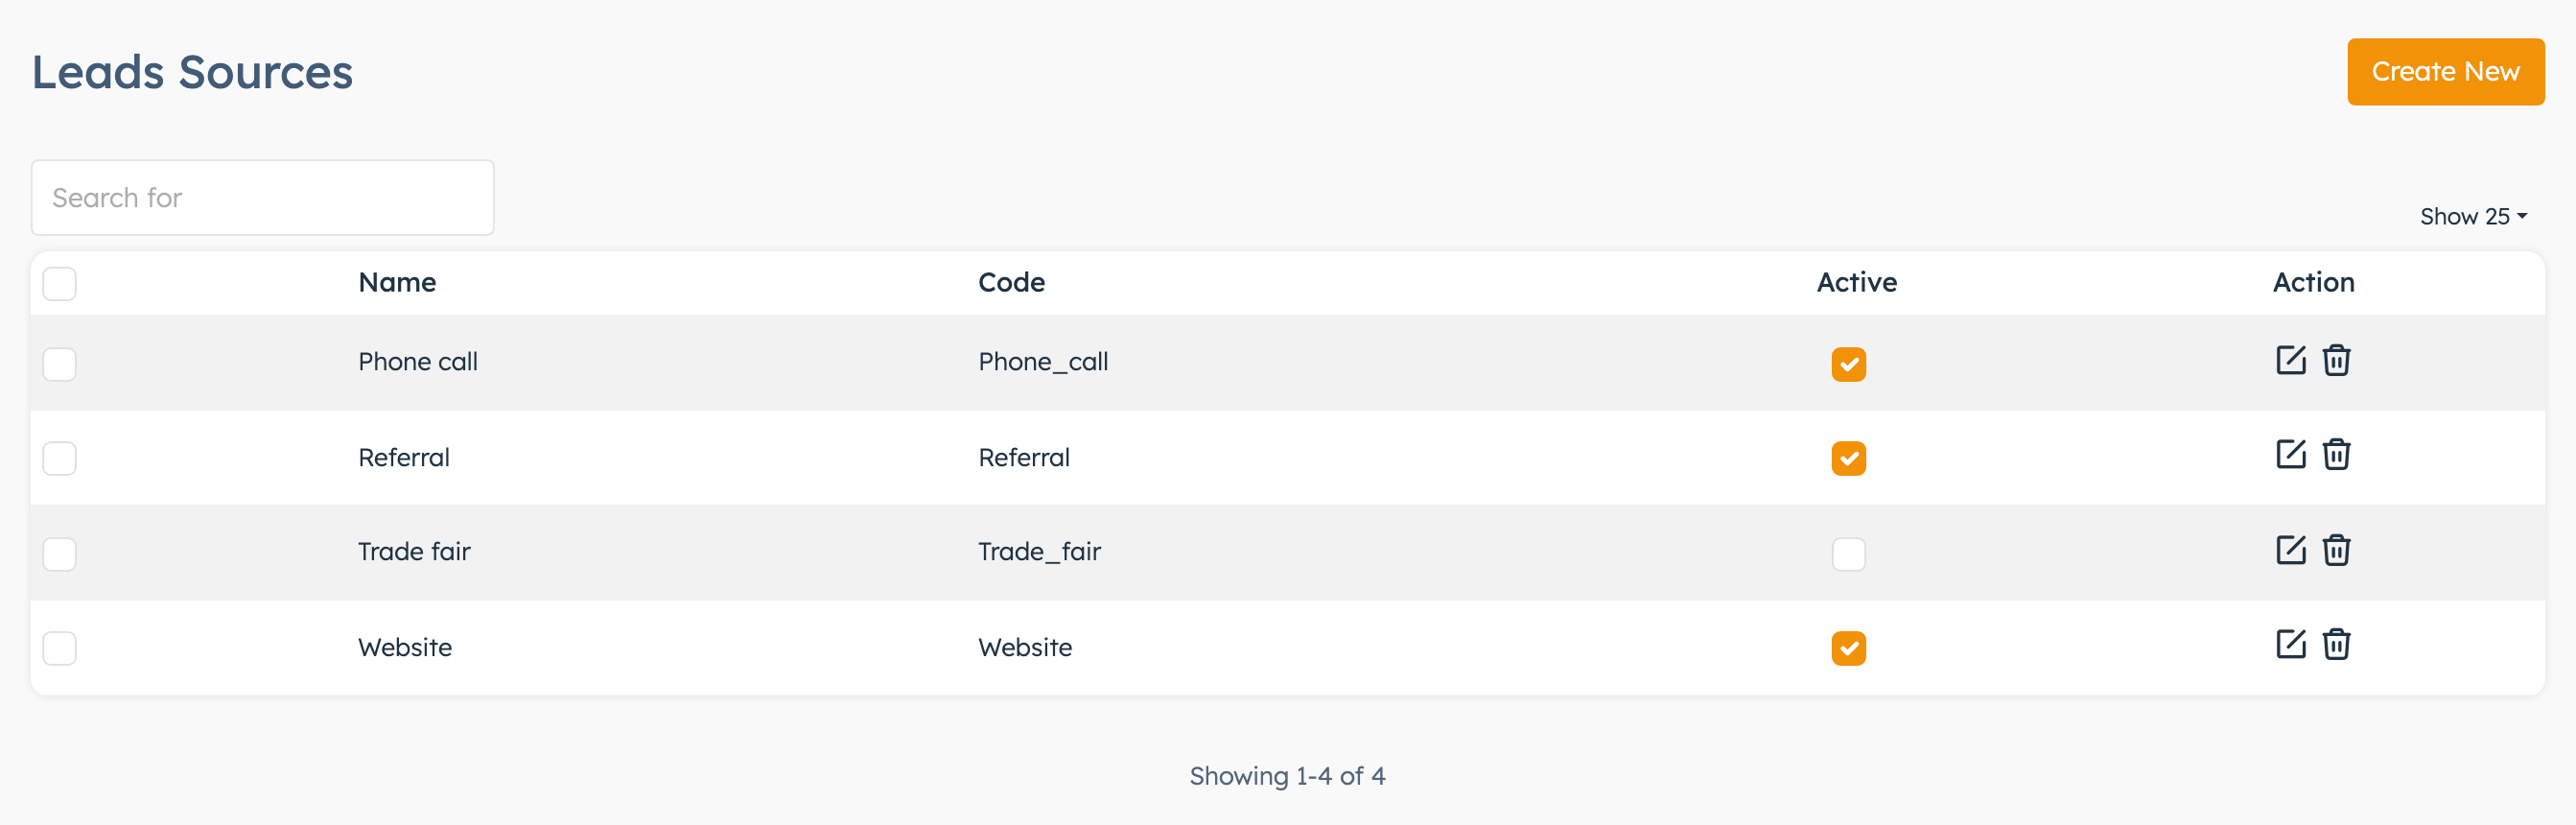
Set up lead sources#
Sources tell you where your leads come from.
- Go to CRM > Settings > Leads Sources and click Create New.
- Type a Source Name, for example "Website" or "Referral".
- Leave Active on and add a Description if it helps.
- Click Save.
To stop using a source, switch it off in the Active column of the sources list. Once a source exists, the switch on its own page doesn't change it. Switch off rather than delete, because leads that point to a deleted source show an empty Source.
Set up lead groups#
Groups let you split leads between teams. Only super admins can open this page.
- Go to CRM > Settings > Leads Groups and click Create New.
- Type a Name and, if you like, a Description.
- Under Leads, pick the leads that belong to the group. A lead can be in one group only, so adding it here moves it out of its old group.
- Under Accessible By, pick the colleagues in Admins.
- Click Save.
Good to know#
- Converting leaves the lead in the list. Use Status (for example Qualified) to mark the ones you've converted.
- Deleting a lead can't be undone. Its contact and proposals stay in the system.
- Leads that arrive from a website form or a support ticket often have no Sales Representative or Group. Until you set one, only super admins see them in the list.
- Last Update changes only when you click Save on the lead. Bulk changes and field updates don't change it.